
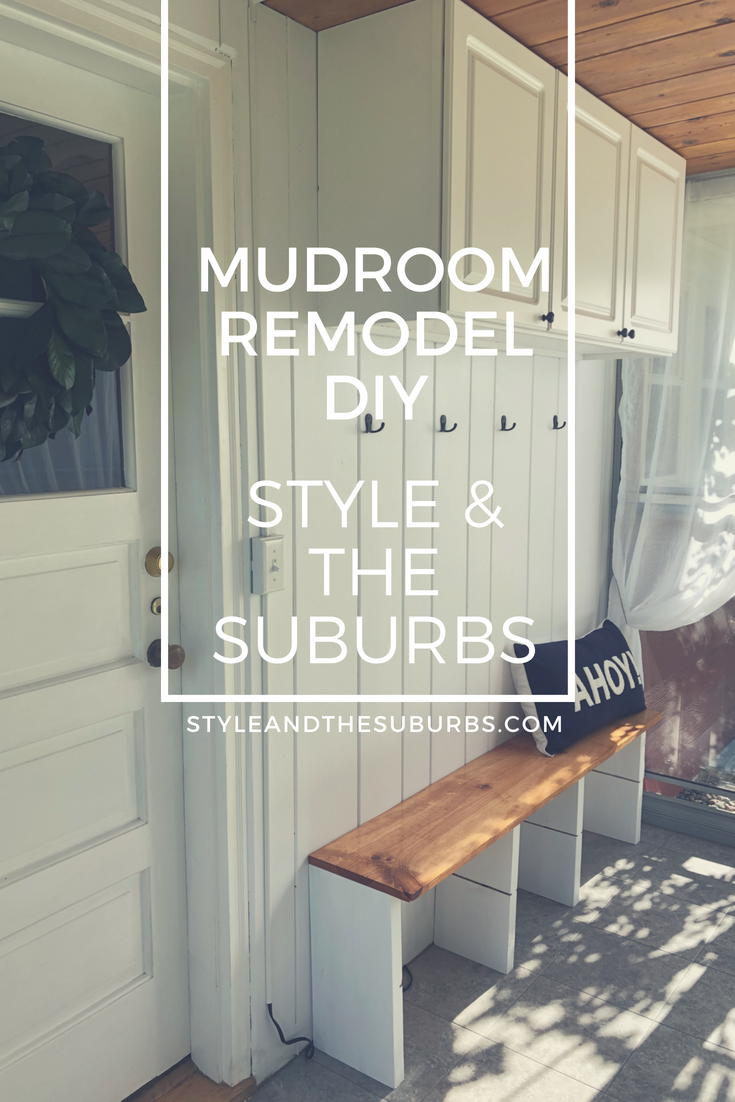
One of the first parts of my kitchen remodel was to update my screen porch into a more usable mudroom to keep the clutter of shoes and jackets out of my kitchen. When I first bought my house, I added new carpet and a hand me down loveseat to make it a sitting area, but it became a catchall and didn’t serve a lot of purpose. The carpet often got dirty, and I didn’t want to keep nicer shoes and jackets on the porch since the screen door didn’t lock.
The goals for the remodel were to refresh the room to a more usable space. My plans included ripping up the carpet and replacing with tile, adding built in storage, lighting, and a door with a lock so the porch could serve as more of a true mudroom.

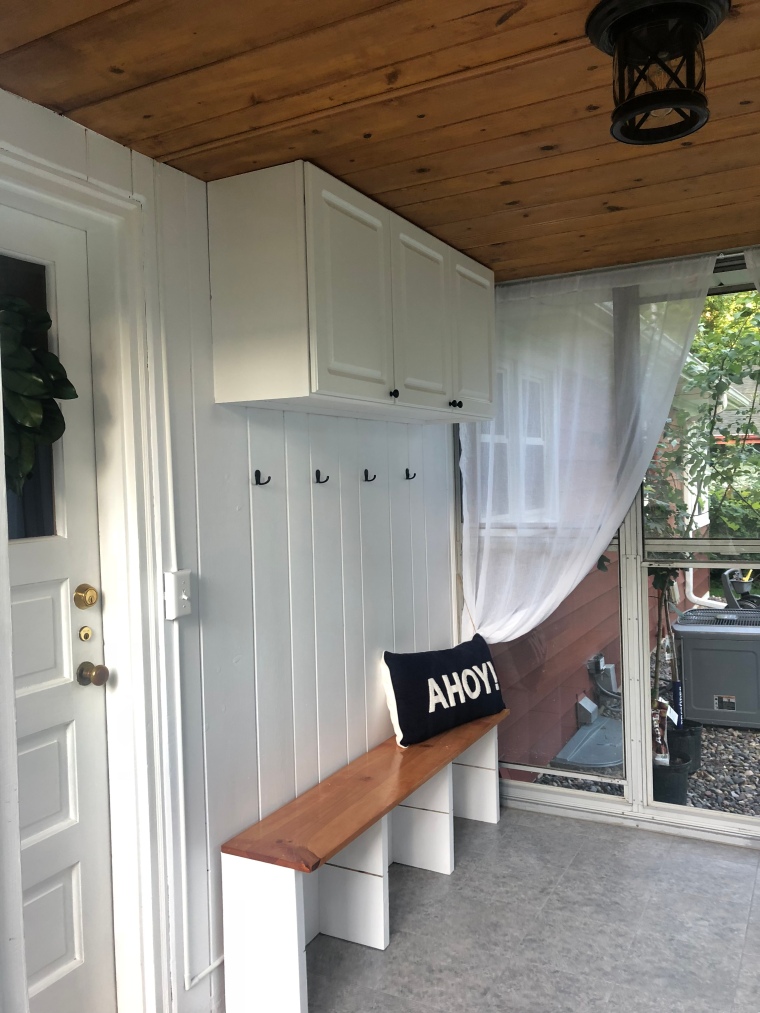
I first planned out how I wanted the storage area of the room. I wanted to install cabinets and a bench with cubbies for shoes on the interior wall. At first, I planned to paint the wall and cabinets gray since white gets so dirty, but I loved the look of white and decided to get a wipable gloss paint instead.
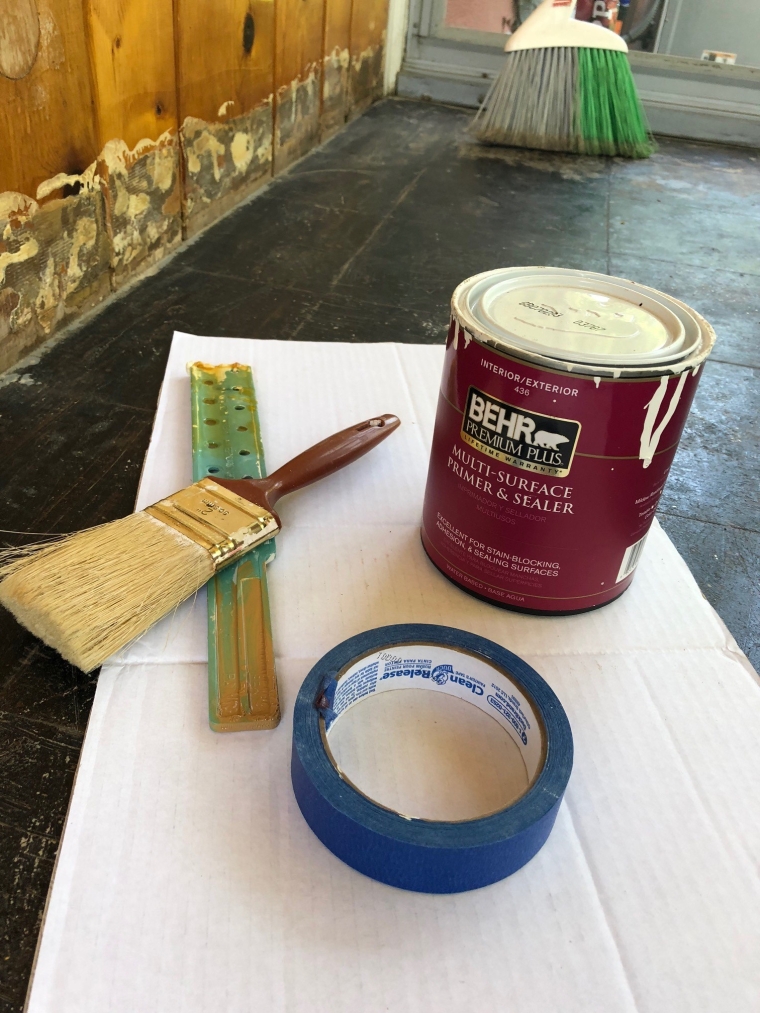
I started the project by ripping up 2 layers of carpet and chipping off old tile to get down to the cement base floor. I always seem to pick these projects on 100 degree weekends, but the hot weather may have helped make the glue soften and everything came up very easy.

Next up was sanding and painting the pine interior wall. I used an electric sander to dull the gloss varnish and then hand sanded all of the grooves. I then used a liquid sander just to make sure the paint would stick. I left the pine wood ceiling alone because the wood was in much better shape and I like the rustic look of it.


I then used a high-hide, high-adhesion primer on the wall. I did 2 coats of primer and then finished with a coat of paint & primer in one wipable paint. I wanted as much coverage as possible in both the paint and primer to cover the wood knots.

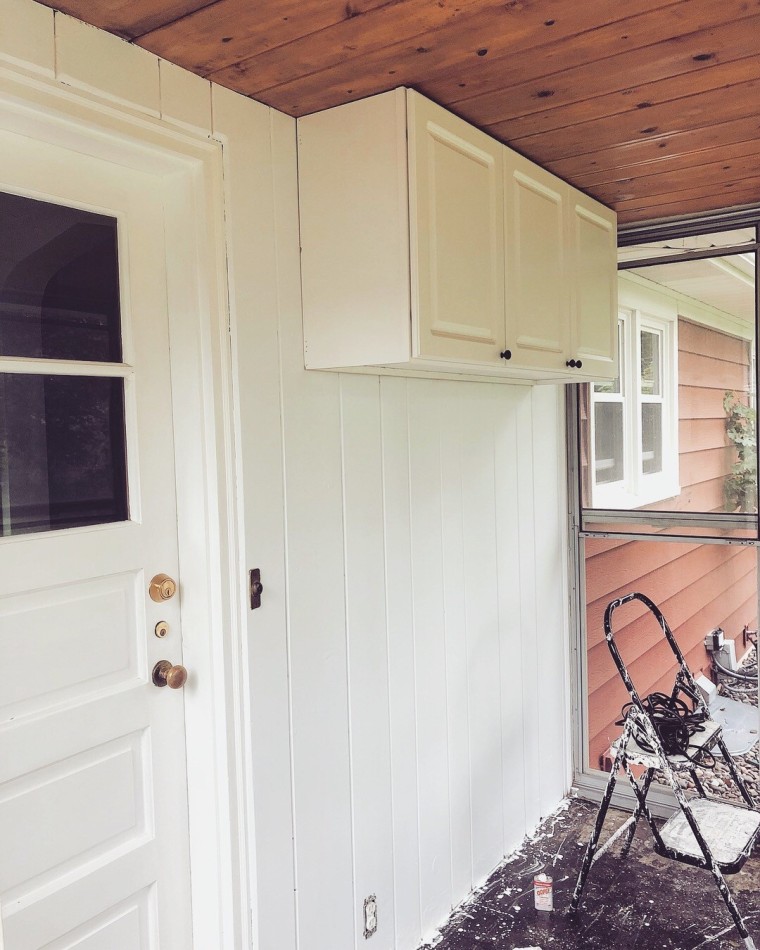
The vent fan for my kitchen comes through the porch wall and the built some sort of box and shelf system around it. We were just going to cut the shelves off and build the cupboards around it, but the whole thing came down as we started pulling off the shelves! Now, we only had to work around the vent itself. I can’t believe how much the white paint brightened up the room already.

I found a great deal on some laundry room cabinets that would work perfect for my space. We had to measure and notch out the back of the cabinets to work around the vent fan, but it was hardly noticeable once the cupboards were up.

After hanging the cabinet, we then tiled the floor. Before the remodel, I had indoor/outdoor carpet that I put over an existing layer of carpet, but it was such a hassle to keep clean. A tile floor is much easier to sweep or mop. I decided to use a dark grout color and gray tile to help hide any dirt or wear.

We also took the time to add a light fixture to the ceiling and run a switch next to the door. The room always had a power outlet but no lighting, which made it really tricky to unlock a door in the dark! I went with a rustic-look light that I got a great deal on at Target. I felt like it fit the space really well!


Next was building a storage bench to go beneath the cabinet. I used pine wood to match the rest of the room, and left the bench seat unpainted to add a little character. If you’ve followed my blog, you know I love stained and varnished wood way more than painted wood! So much more timeless!

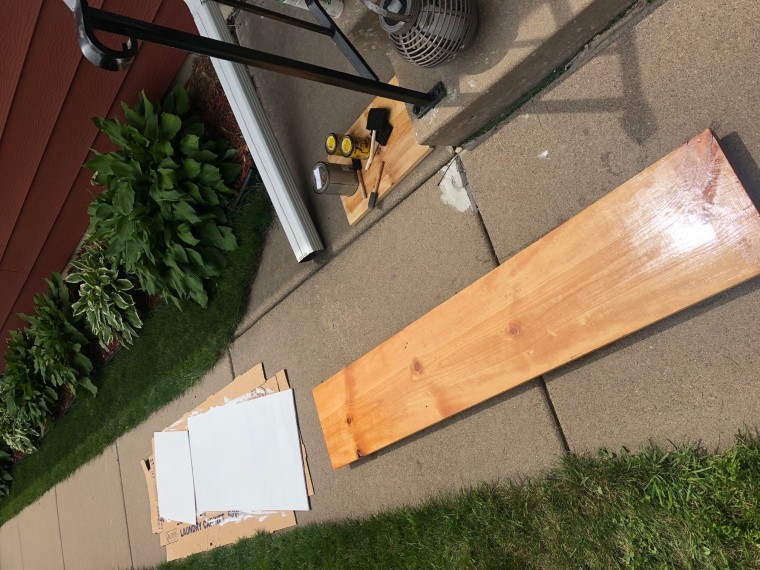
We also notched out the uprights of the bench so that little shelves could be inserted to create more shoe storage. They can be removed to accommodate taller shoes or boots! I also picked really simple black coat hooks for the wall behind the bench.

To furnish the room, I added a pretty white cabinet (which was almost too nice to just have on a porch?!)) and a couple of stools that I got a great deal on. The furniture was more “for looks” since I don’t often sit in the room, but I might add a comfy chair one day if I can find a new deal (always on a budget here!). I also added sheer white window panels which is my go-to to brighten up a space but add a little privacy.

Can you believe the difference the remodel made for the room! So clean, pretty, and useful now!


Looks AMAZING! Wow, you have a real talent here Karen!!
Thank you! You’re so sweet! I would’ve done the project years ago if I would’ve known the difference it would make!
I loved this remodel so much that I had to mention it in my blog post today. You did a wonderful job!
Thanks for featuring me! Its my favorite room in my house now!